Garlic Butter Mushroom
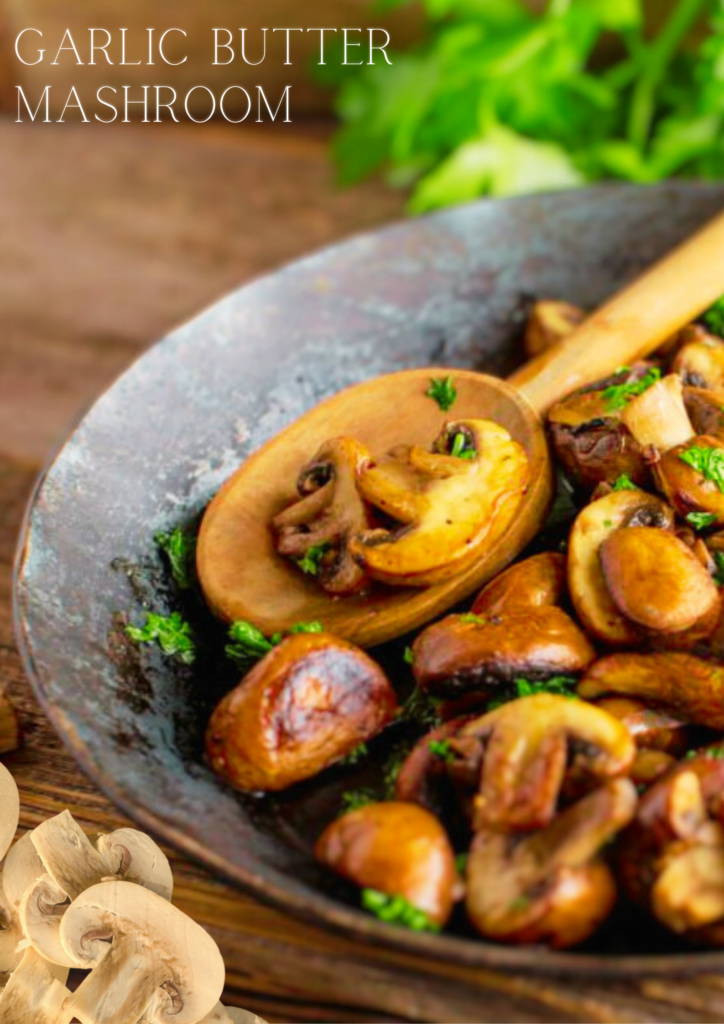
The garlic butter mushrooms recipe is the one that makes everyone’s mouth water every time I make it. This combination itself is something special. I love making it for my husband and this recipe has become our go-to food that makes our simple weeknights into something special. Initially, When I started experimenting with mushrooms & their different variations, I was craving something that was quick & easy to prepare as well as packed with flavour. This garlic butter mushroom ticks all the empty spaces. The ground flavours and earthiness of the mushrooms combine with a strong punch of garlic and buttery richness, creating a symphony of flavours that is really hard to resist. This dish perfectly goes with pasta or rice dishes – a great side dish. My husband has a different kind of love for mushrooms, it reminds him how he misses his mother’s mushroom recipe. So, I took it as a challenge and created something that would become our own family recipe. Let’s discuss the ingredients you need to make this delicious recipe Mushrooms Use any kind of mushrooms. I used white buttons, but you can use cremini, or baby bellas. Or sometimes a mix of them is also not bad. Oil Just a little olive oil for nice and crispy sauteed mushrooms. It also prevents butter from burning. Butter I used unsalted butter. It gives control over salt. Mushrooms already have natural salt. So if you’re using salted butter add less salt. Garlic Use fresh garlic for the punch. It gives rich umami flavour. The quantity should depend upon your taste. Add little or more as you wish. Parsley Optional. It elevates the flavour of mushrooms. ( And I just love to add more) Salt & pepper Some seasoning needed. Some recipes also call for lemon juice. You can drizzle some fresh juice. It gives freshness to the mushrooms. Steps Mushrooms can absorb water too easily, So give a quick rinse under water and then pat dry with a damp paper towel. Now cut the mushroom in half or you can cook it just as it is. In the large pan, On the medium heat melt 4-5 tablespoon of butter. Then add mushrooms to the pan in a single layer. Don’t overcrowd – cook in batches if necessary. Let mushrooms cook undisturbed for 4-5 minutes until golden brown on one side. Add remaining butter and minced garlic, stirring frequently for 1-2 minutes until fragrant. Then add some salt & Pepper according to your taste. At the end garnish it with some fresh parsley or cilantro. And its ready to serve. Health benefits of mushrooms: Mushrooms are packed with antioxidants, Vitamins and minerals. They are a true nutritional powerhouse. They’re also high in fibre, and low in calories, making them perfect food for loosing weight. Mushrooms are also a natural source of vitamin D, Selenium and copper. The Fascinating World of Mushroom In many parts of the world, mushrooms grow but certain varieties thrive in some specific areas. For example, white button mushrooms are cultivated worldwide and other varieties like porcini are found in European forests. Shiitake mushrooms are famous in Asia and enoki are in North America. Mushrooms need dark and humid conditions for better cultivation. They need careful temperature and humidity control. Tips on how to wash mushrooms properly. The best way to clean the mushrooms is to lightly wipe each with a damp paper towel or soft pastry brush. This will remove dirt and debris. Then a quick rinse under the cold water and thoroughly pat dry it with a paper towel. Mushrooms tend to absorb water just like a sponge. So avoid soaking them in water since you don’t want watery and soggy mushrooms. Storage options: Fresh mushrooms: You can store mushrooms in a paper bag for up to 1 week in the fridge. Cooked mushroom: Keep it in an airtight container for 2-3 days. Dried mushroom: You can store dried mushrooms in a cool, dark place for up to 6 months in an airtight container. Can I use dried mushrooms instead of fresh? Yes, but rehydrate them first in warm water for 20-30 minutes. Why are my mushrooms rubbery? This usually happens when the pan is too crowded or the heat is too low. Can I make this recipe vegan? Absolutely! Replace butter with olive oil or vegan butter. You May Also Like !!! Garlic Butter Mushroom December 13, 2024 Read More Easy Strawberry Smoothie November 13, 2024 Read More Quinoa Salad Recipe November 11, 2024 Read More 9 Benefits of eating cashews every day November 5, 2024 Read More How To Sterilise Jars For Preserving October 16, 2024 Read More 9 best dip recipes October 4, 2024 Read More Homemade berry jam (Without pectin) October 2, 2024 Read More 5-minute salsa dip recipe | With fresh tomatoes October 2, 2024 Read More Muhammara dip recipe (red pepper and walnut dip) October 2, 2024 Read More
Easy Strawberry Smoothie
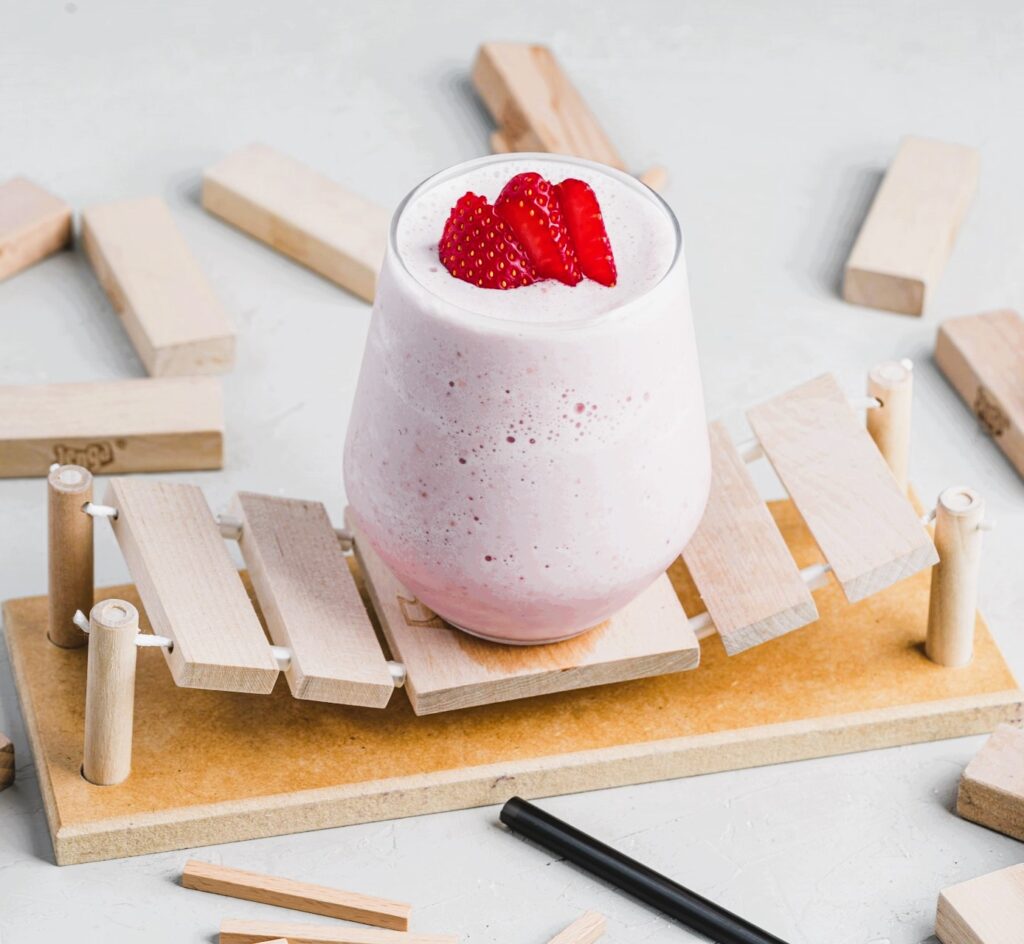
Strawberry smoothies are a delightful blend of freshness and sweetness, perfect for a quick and nutritious breakfast or a refreshing pick-me-up during the day. As a smoothie enthusiast and a culinary enthusiast, I’ve experimented with various recipes to find the perfect balance of flavor and simplicity Strawberry Smoothie Strawberry is great source of : Magnesium Phosphorous Calcium Potassium Folate Vitamin K Manganese Ingredients to make strawberry smoothie 1 cup of fresh or frozen strawberries 1/2 cup of plain Greek yogurt 1/2 cup of milk (dairy or non-dairy) 1 tbsp of honey (optional)Strawberry Smoothie Process of making strawberry smoothie Add hulled strawberries, plain greek yogurt, milk. Lid your blender, and you are ready to blend. Add some ice cubes in blender Pour and it is ready to serve! (Adjust milk amount to your taste. I know some people like it a bit thick, and others not so thick.) Best way to Serve strawberry smoothie Pour the strawberry smoothie into a glass. Garnish with a fresh strawberry or a sprig of mint (optional) for an extra touch of elegance. Enjoy your homemade strawberry smoothie immediately for optimal flavor and freshness. Who Can Consume It? Well, anyone can take it except for people on blood clotting medication. You May Also Like !!! Garlic Butter Mushroom December 13, 2024 Read More Quinoa Salad Recipe November 11, 2024 Read More 9 Benefits of eating cashews every November 5, 2024 Read More How To Sterilise Jars For Preserving October 16, 2024 Read More 9 best dip recipes October 4, 2024 Read More Homemade berry jam (Without pectin) October 2, 2024 Read More 5-minute salsa dip recipe | With October 2, 2024 Read More Creamy Cashew Dip (vegan) October 2, 2024 Read More Muhammara dip recipe (red pepper and October 2, 2024 Read More
Quinoa Salad Recipe
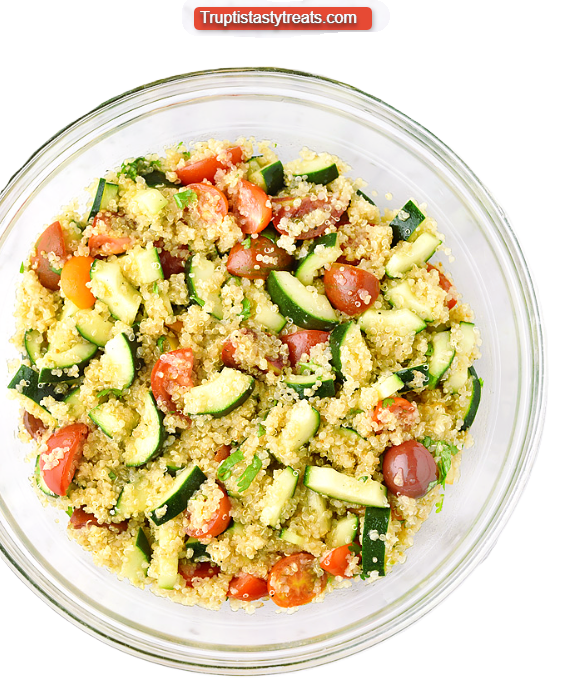
Quinoa salads are an excellent way to enjoy a wholesome, nutrient-rich meal that’s both versatile and tasty. Whether you’re looking for a light lunch, a side dish, or a filling dinner, quinoa salads will offer you endless combinations of flavors, textures, and colors. Quinoa Salad Quinoa is one of the most protein-rich plant foods. Not only is it packed with essential nutrients, but it’s also gluten-free and easy to prepare. Dive into this list of mouth-watering quinoa salad recipes that will make your meals healthier and more exciting! The health benefits of Quinoa Salad Health benefits of quinoa, including protein, fiber, and antioxidants Perfect for gluten-free diets and offers a low-glycemic option Ideal for meal prep, as quinoa holds up well in salads over several days Quinoa Salad Ingredients 1 cup cooked quinoa 1 cup mixed greens ½ cup cherry tomatoes, halved ¼ cup cucumber, diced ¼ cup bell peppers, diced 2 tbsp olive oil Juice of 1 lemon Salt and pepper to taste Process of making quinoa salad Cook the Quinoa : Start by cooking your quinoa according to the package instructions. Once done, fluff it with a fork and let it cool. Prep the Veggies: While the quinoa is cooling, prep your veggies. Slice the tomatoes, dice the cucumber and bell peppers, and grab a handful of mixed greens. Make the Vinaigrette: In a small bowl, whisk together the olive oil, lemon juice, salt, and pepper. Taste and adjust the seasoning if necessary Assemble the Salad: In a large bowl, combine the quinoa with the veggies and greens. Drizzle the dressing over the salad and toss gently. Serve or Store: Enjoy right away or store in the fridge for up to two days. It’s perfect for a quick lunch or a light dinner! Recipe Variations This nutritious quinoa salad recipe is delicious as written, but feel free to get creative! You can easily customize it to suit your cravings or use what you have available. Here are a few different ideas to get you started: To Make it vegan. Omit the cheese! Add some more olives or roasted tomatoes to boost the savory flavor. Switch the grain. Instead of quinoa, use farro or Israeli couscous. Note that the salad will no longer be gluten-free. Swap the dressing. Replace the Italian dressing with Greek salad dressing or lemon vinaigrette. Take a shortcut. Replace the roasted tomatoes with fresh cherry tomatoes, halved, or oil-packed sun-dried tomatoes. Let me know what variations you try! 8 Different style of quinoa salads you should try Mediterranean Quinoa Salad Southwestern Quinoa Salad Thai-Inspired Quinoa Salad Harvest Quinoa Salad Greek Yogurt and Herb Quinoa Salad Fruit and Nut Quinoa Salad Spicy Indian-Inspired Quinoa Salad Caprese Quinoa Salad You May Also Like !!! Easy Strawberry Smoothie November 13, 2024 Read More 9 Benefits of eating cashews every day November 5, 2024 Read More How To Sterilise Jars For Preserving October 16, 2024 Read More 9 best dip recipes October 4, 2024 Read More Homemade berry jam (Without pectin) October 2, 2024 Read More 5-minute salsa dip recipe | With fresh tomatoes October 2, 2024 Read More Creamy Cashew Dip (vegan) October 2, 2024 Read More Muhammara dip recipe (red pepper and walnut dip) October 2, 2024 Read More Quick Garlic Butter Spread October 1, 2024 Read More
Homemade berry jam (Without pectin)
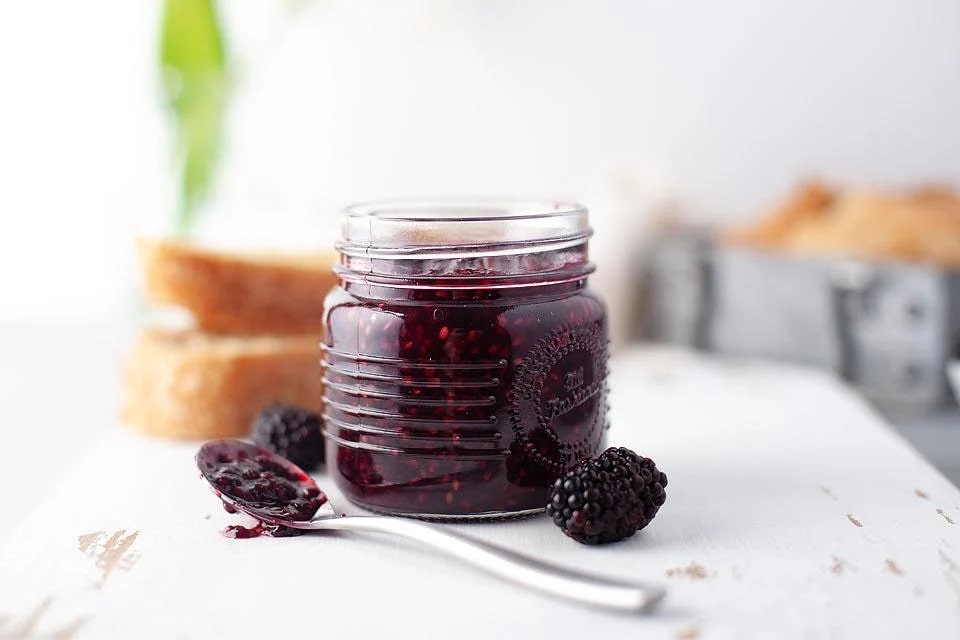
This homemade mixed berry jam is made using seasonal berries like – strawberries, blueberries, blackberries and raspberries. This jam is so delicious that you’ll want to put it on everything from bread and pancakes to ice cream. Mixed-Berry-Jam The best thing about homemade berry jam is that you can adjust the sugar level. Use seasonal berries that already have natural sugar inside so they’re fresh, delicious yet healthy. Seasonal fruits jam I think everyone loves summer fruits. There’s a tradition in my family that in every summer we used to go to the local farmers market and pick up eachothers favourite berries. It’s always been fun to experiment with different flavours and sharing with my family and friends. I always used to ask my mom why she made dozens of jars of jam for our friends. The answer is simple: we love to share things. And oh heavens, that legacy runs in me now. Mixed Berry Jam How it works wonders Triple berries like strawberries, blueberries and blackberries, when combined – A Deadly combination. Traditionally, Jam making is amazing . Homemade jam = less sugar. My favourite part of making homemade jam is the ability to control the amount of sugar level. If you buy the jam from the store please read the nutrition level. There’s loads of sugar levels in there. Also, I would like to add that, this won’t be set as store-bought jam. Because mine is pectin free.!! How to make homemade berry jam Get your jars ready. Before you start, sterilise your jars and put a plate in the freezer to chill. Gather your ingredients like berries, lemon juice and sugar into a pan. Turn on the flame and start stirring it with a wooden spoon. Let it hit until sugar is melted and fruits become softer. Let it boil for about 5 minutes. Cook uncovered and keep stirring. After about 15 minutes the jam will start to thicken. Now, place triple berry jam into the jars. Remove any air bubbles. Put your jars for 7-10 minutes in boiling water. How to check if the jam is done cooking. It’s a cool trick. Place a metal tray in the freezer before you start cooking your jam. Add a small amount of jam to the tray. If the jam doesn’t run then you’re good to go. It is set!! If it’s too runny, cook for another 5 minutes and repeat the same process. Check out our other posts on dips and spreads Muhammara Dip Creamy Cashew Dip Easy Taco Dip Garlic Butter Spread Cucumber benedictine Quick beetroot hummus Avocado Spread Recipe Cookie Butter Recipe Storage tips After opening the jar it can be stored in the refrigerator for up to 1 month. If the jar is sealed then store it in a cool, dark place for up to 1 year. You May Also Like !!! How To Sterilise Jars For Preserving October 16, 2024 Read More 9 best spread and dips recipe October 4, 2024 Read More Homemade Salsa Dip October 2, 2024 Read More Creamy Cashew Dip October 2, 2024 Read More Muhammara dip recipe (red pepper and walnut dip) October 2, 2024 Read More Garlic Butter Spread October 1, 2024 Read More Blackberry virgin mojito – mocktail recipe September 30, 2024 Read More Easy Benedictine Spread Recipe September 30, 2024 Read More Roast Beetroot Hummus September 30, 2024 Read More
5-minute salsa dip recipe | With fresh tomatoes
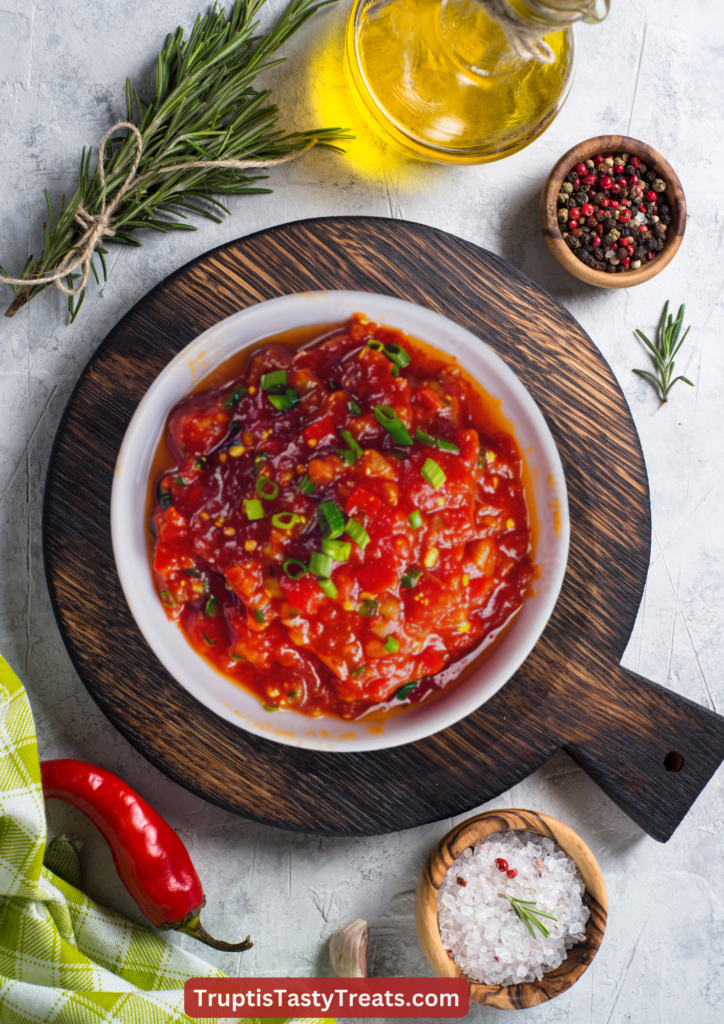
The greatest homemade salsa dip recipe! This restaurant-style salsa can be made with fresh ingredients and ready for snacking in 5 minutes only. It’s perfect served with tortilla chips or as a topping over any Mexican food like burritos, tacos, nachos, and so forth. Salsa Dip This best homemade salsa dip can be made with canned or fresh ingredients. But in my opinion, fresh tomatoes any day make a world of difference. This is hands down my family’s favourite salsa recipe. It’s just a perfect balance of tanginess and sweetness. My husband especially loves this because it’s not too spicy. I always put a little less onion and garlic. Also the lime juice perfectly balances and binds the ingredients together. I tried many recipes from the internet. Some were made with roasted ingredients, others got a bit smokey, and spicy from dried red chilies. This super easy salsa dip always tastes spicy, bright, and zesty. Store it in an airtight container for 3 days in the refrigerator. Serve it along with tortilla chips or nachos. Never fails to impress Ingredients you’ll need for this homemade salsa Fresh tomatoes Use fresh roma tomatoes. Avoid using soft ones. Roma tomatoes are always less watery than any other ones. If you can’t find it then use any other variety Fresh cilantro It gives green visuals and freshness to the dish. Jalapeno To add some heat. If you don’t like it then replace it with half chopped red bell peppers. Red Onion For sharp flavour. Wash and rinse the onion before adding it to the food processor. Lime juice To brighten your salsa Garlic Use fresh garlic for a flavourful punch Green onion Again, It gives some earthy taste. But if you don’t like it you can avoid it Salt & pepper To make all the flavours pop! Chilli powder & cumin It’s really nice addition if you add them Sugar To balance out the acidity coming from lime and tomatoes How long can salsa last? You can store this salsa in the refrigerator for upto a week. But trust me, fresh salsa tastes better. Just make this recipe ahead of the time. And serve it in the bowl whenever in need. taco with dips Tips on making the best salsa Never blend your salsa. Some chunks are good in taste. Always, always, and always use fresh ingredients. Avoid canned ones. Spice level, I always put whole jalapeno in my salsa. I just love my salsa to be more spicy. You can adjust the level of spiciness by adding half or even little jalapenos. Instruction Gather all the ingredients, Initially Put onion and garlic into the food processor and blend them until you reach a good consistency Now add other ingredients like tomatoes, jalapenos, lime juice, cumin, sugar, salt & pepper. Pulse until combined but still chunky Now, if the salsa is too watery, strain it half to remove some of the liquid. And combine the chunky mixture with remaining salsa Strain out more if you prefer a chunkier texture Keep the salsa bowl in the fridge for 2 hours. The chilled one pulls out the best flavours Serving suggestions Perfect when served with tortilla chips. And there are other variations too to use this dip. Use this salsa dip along with nachos, a burrito bowl, tacos, or even with roasted veggies. Check out our other posts on dips and spreads Muhammara Dip Creamy Cashew Dip Easy Taco Dip Garlic Butter Spread Cucumber benedictine Quick beetroot hummus Avocado Spread Recipe Cookie Butter Recipe What is the difference between salsa and pico de gallo? Salsa is usually made in a blender while pico de gallo is made with chopped or diced ingredients and has a chunkier texture. You May Also Like !!! How To Sterilise Jars For Preserving October 16, 2024 Read More 9 best spread and dips recipe October 4, 2024 Read More Homemade berry jam (Without pectin) October 2, 2024 Read More 5-minute salsa dip recipe | With fresh tomatoes October 2, 2024 Read More Muhammara dip recipe (red pepper and walnut dip) October 2, 2024 Read More Garlic Butter Spread October 1, 2024 Read More Blackberry virgin mojito – mocktail recipe September 30, 2024 Read More Easy Benedictine Spread Recipe September 30, 2024 Read More Roast Beetroot Hummus September 30, 2024 Read More
Creamy Cashew Dip (vegan)
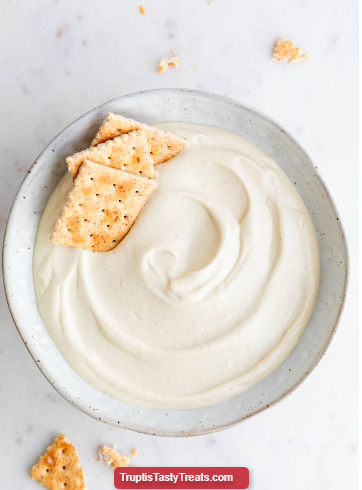
This creamy cashew dip is heaven for all vegetarian dip lovers. It’s so delicious, creamy, and thick with full of rich flavours you can resist. Vegan Cashew Dip with Crackers I have been obsessed with this dip for the past month. Whenever I feel like I am in no cooking mode, I mix this dip and have it in my veggies or pasta bowls. This 5-minute dip is a godsend. It is so creamy and such an easy thing to make. Wholesome as well. You will be addicted to making this dip once you try my creamy cashew dip recipe. And it is so simple. Just gather all your ingredients and blend them until they get a super creamy base. This crave-able dip is so versatile. You can use it in multiple ways. For example, use it as a veggie dip or even as a salad dressing, or even in pasta!! Let’s discuss the ingredients you need to make this delicious vegetarian dip: Soaked Cashews Of course, the Main element. You need to soak the raw cashews overnight. If you don’t have time to soak it. Use 5 min quick hack. Boil them for about 3-4 minutes. Easy Water To make this spread rich and nutty Garlic Use water as required. It’s up to you; how thick do you want your dip’s consistency Honey This adds tanginess and sweetness. Lemon juice To give muhammara a rustic finish, to also thicken the dip Salt For the savory punch Vegan Cashew Dip with Crackers Whenever I think of making this cashew dip I think of some sort of blank canvas. Because this dip is so versatile, the blend of cashews, garlic, and salt works wonders. It is a pick-me dip for all vegetarian lovers. My all vegetarian friends come and ask me to make it very often. Stpes Take 1 full bowl of soaked cashews. Rinse with water thoroughly Add soaked cashews to the food processor or high-power blender. Along with it, add some garlic, Salt, Lemon juice, and a little bit of honey. Blend all this together on high speed until it gets super smooth consistency. Scrap down the sides with butter knife and make a thick dip of your liking. Adjust the taste and it’s ready to be served. There are plenty of variations you must try. Always try to experiment with things. Eventually, you will discover something that you always craved. For example try blending ginger, sriracha or rosemary, and cintro-Lime. These flavour variations are often great to fusion things. You must check out our other vegetarian dips as well. Muhammara Dip Easy Taco Dip Garlic Butter Spread Cucumber benedictine Quick beetroot hummus Avocado Spread Recipe Cookie Butter Recipe Why I love this dip! Reasons? Because this dip is simple and easy and super quick. With just 5 ingredients it gets ready in 15 minutes. Second, you could say because it’s healthy. And makes a great appetiser. Calls for a great party starter. Another reason is, it’s suitable for vegetarians or vegans. Recommended Tips You May Also Like !!! How To Sterilise Jars For Preserving October 16, 2024 Read More 9 best spread and dips recipe October 4, 2024 Read More Homemade berry jam (Without pectin) October 2, 2024 Read More 5-minute salsa dip recipe | With fresh tomatoes October 2, 2024 Read More Muhammara dip recipe (red pepper and walnut dip) October 2, 2024 Read More Garlic Butter Spread October 1, 2024 Read More Blackberry virgin mojito – mocktail recipe September 30, 2024 Read More Easy Benedictine Spread Recipe September 30, 2024 Read More Roast Beetroot Hummus September 30, 2024 Read More
Muhammara dip recipe (red pepper and walnut dip)
Hey there! So you’re into Muhammara dip, hah? Let me tell you, this Middle Eastern creativity is like a flavor explosion in your mouth! Muhammara dip Picture this: you’ve got this awesome mix of walnuts and roasted red peppers, all blended up into this killer dip. It started in Syria, but now it’s taking over the world, and for good reason! I’m telling you, once you try this stuff, you’ll be hooked. It’s got everything – savory, sweet, a hint of smokiness, and just enough kick to wake up your taste buds. Seriously, it’s my go-to for jazzing up a plain old piece of toast. The favorite part? It’s super easy to try at home. Grab some pita or any crispy bread, and you’re in business. Or hey, slap it on a sandwich and take your lunch game to the next level. I love making this Muhammara dip in the summer. It’s the perfect way to kick off a meal or impress your friends at a cookout. Now, here’s the secret to making it pop: a splash of lemon juice and some pomegranate molasses. Trust me, it adds this amazing tangy-sweet vibe that’ll have you returning for more. What ingredients you’ll need in this recipe? Rosted Red Peppers I usually roast my own red peppers but you can use jarred ones and save your time & energy on better things Walnuts To make this spread rich and nutty Olive oil To make your spread spreadable, help other ingredients mix well Bread crumbs To give muhammara a rustic finish, to also thicken the dip Garlic For the savory punch Lemon juice To give freshness and refreshment to the dip Cumin It will give an aromatic and earthy flavour to the recipe What you can eat muhammara dip with? This dip gives so much earthy vibe. It hit kind of differently when mixed with walnuts and pomegranate molasses. You can have the dip with roasted veggies like carrots, cucumbers, or radishes or you can have it on warm pita bread, or crackers. Sandwiches are also a great option to have muhammara. Just give it a try! Instructions How to roast red peppers – coating them with oil, then place them on the stove, and cook until it is ready to break the skin and other option is preheat you oven to 450 degrees F and place whole red peppers on the baking sheet. Fully roasting will take approx 20-25 Min. Set it aside for about 10 minutes. Peel the skin and remove the seeds. Gather all your ingredients into clean blender Add breadcrumbs, cumin, garlic, walnuts, olive oil, and lemon juice and combine them Now add roasted peppers to the mix. The texture should be a little bit thick. You can taste and adjust it by adding some acidity. For the garnish, you can add many things, but I chose coriander and black seeds. Checkout our other dips Why I love this recipe: It is so simple and easy to make. One single bite has so much taste. it is Smoky, Spicy, subtly sweet, delicious, and earthy at the same time. How to store this Muhammara dip : You can store this dip in an airtight container for about a week in the refrigerator. You May Also Like !!! Easy Strawberry Smoothie November 13, 2024 Read More Quinoa Salad Recipe November 11, 2024 Read More 9 Benefits of eating cashews every day November 5, 2024 Read More How To Sterilise Jars For Preserving October 16, 2024 Read More 9 best dip recipes October 4, 2024 Read More Homemade berry jam (Without pectin) October 2, 2024 Read More 5-minute salsa dip recipe | With fresh tomatoes October 2, 2024 Read More Creamy Cashew Dip (vegan) October 2, 2024 Read More Quick Garlic Butter Spread October 1, 2024 Read More
Quick Garlic Butter Spread
This quick recipe Garlic Butter Spread is buttery, cheesy, and extremely spreadable. It is super easy to make and super delicious to use for making garlic bread. Make it any day and enjoy it with your favourite bread. Eventually, it is the perfect side dish for any dinner. You can make it ahead of time and just store it in the fridge. This garlic butter spread is so rich, ravishingly made with melted butter, stuffed with roasted garlic, and studded with fresh herbs. What type of bread is best for garlic butter spread? There are so many types of bread out there in the market. But Italian or French bread is best. Because they’re pretty well in soaking up all the butteriness we made. But at the end of the day, make this garlic butter spread with any type of bread you have! Simple Ingredients Salted Butter Should be at room temperature. If you do not have time for it. Then place the butter on a plate and microwave on 10% power for 1 minute Garlic You can use roasted garlic for the delicious and punching flavour. Black Pepper To add the heat Bread you can use any preferred bread. Although white loaves work magic for this recipe. Parmesan Cheese Top it up with any type of cheese you like Why do I simply love this recipe? Simple and easy – I tell you, You just need a few basic ingredients from your pantry. Great appetizer – This recipe is perfect for any party starter. It will just take 15-20 min including baking time. Save your time and effort a lot. Garlic and butter – Using freshly minced garlic instead of garlic powder adds so much flavor to this dish. Mixing with salted butter perfectly compliments. Instruction Gather your ingredients and preheat the oven to 170 degrees C. In a large bowl, Combine roasted garlic, butter, parmesan cheese, all the seasoning, black pepper and parsley. Stir it until well combined. Take any bread of your choice and spread half a generous amount of garlic butter spread mixture. Now transfer your bead onto a baking sheet. Let it bake in the preheated oven until the butter mixer melts and start to bubble. This is gonna take about 10-15 minutes. Watch it carefully so it doesn’t burn! Slice your bread into small sticks and serve! Other spread recipes you should try out: Cucumber benedictine Quick beetroot hummus Avocado Spread Recipe Cookie Butter Recipe Ways to use this garlic butter spread: You can use this on garlic bread, roast potatoes, or even on roasted vegetables. Stir it in pasta You can use this spread on the pizza base, by mixing it with pizza sauce You May Also Like !!! Easy Strawberry Smoothie November 13, 2024 Read More Quinoa Salad Recipe November 11, 2024 Read More 9 Benefits of eating cashews every day November 5, 2024 Read More How To Sterilise Jars For Preserving October 16, 2024 Read More 9 best dip recipes October 4, 2024 Read More Homemade berry jam (Without pectin) October 2, 2024 Read More 5-minute salsa dip recipe | With fresh tomatoes October 2, 2024 Read More Creamy Cashew Dip (vegan) October 2, 2024 Read More Muhammara dip recipe (red pepper and walnut dip) October 2, 2024 Read More
Blackberry virgin mojito – Non alcoholic
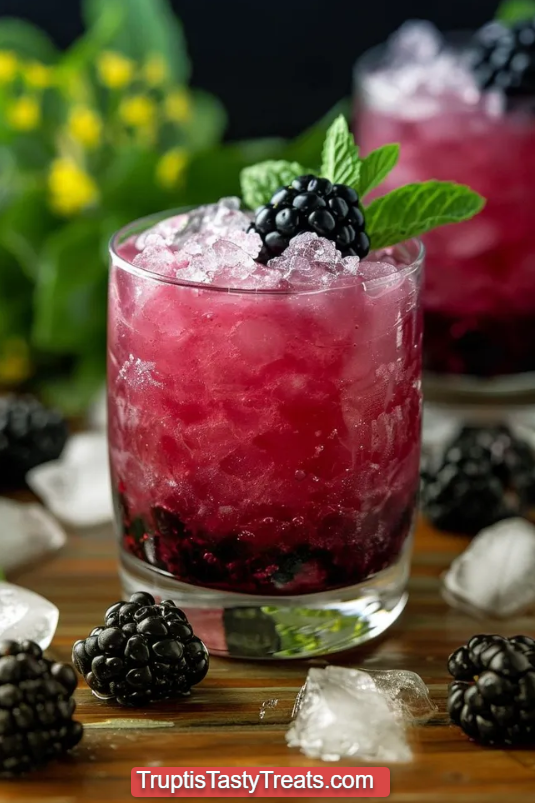
This non-alcoholic Blackberry virgin mojito mocktail is the most refreshing and sure to be your new favourite summer drink. Blackberry mojito This mocktail recipe is so cool and refreshing drink to sip on when it’s hot out. Made with a berry twist, fresh mint, soda, a little bit of sugar, and lime juice. Classic mojitos are anytime refreshing with varieties of fruits and fresh mint or basil. This mocktail is so simple and easy to make yet all ages can enjoy it!! In the season of berry picking, I love to go on the farms with my family. Normally we pick strawberries, blueberries or raspberries. But blackcurrents are my favourite. You can make fresh berry pie, smoothies or even icecreams. My husband loves berry shake. I usually throw all berries in the mixure and blend it with yogurt. You can also add some dry fruits or any sweetness. You can Refrigerate it for almost a week. This blackberry virgin mojito will take just a few minutes to prepare. Ingredients to make Blackberry mojito 1 bunch of Mint leaves To give refreshment to your drink ( pick off mint leaves from the stems ) ½ cup Blackberries You can use fresh or frozen 2 tbsp Simple Syrup The detailed recipe to make this syrup is written below. Soda You can use soda water or sparkling water instead Ice ice cubes Blackberry-Mojito Create simple syrup Create your own simple syrup by just following easy steps. Take 1 cup of water and 1 cup of sugar to a boil Let it boil until the sugar dissolves Let it cool completely. Once it cools. Ready for serving I love a Refreshing mocktail as much as anything, and mojitos are always a top choice for me. I’m a lover of delicious and beautiful drinks. I always crave to make mocktails at home so that everyone of all ages can enjoy them. Steps to make blackberry virgin mojito Wash and pat dry blackberries and mint leaves. With the help of the muddling tool, crush blackberries, and mint leaves together When it reaches the desired consistency, add some simple syrup Now make an equal amount of portions, and throw in 2 glasses Squeeze lime juice into the mix and give it a good stir Add 2-3 ice cubes on the top List ItemPour soda water or sparkling water into the glass Give it a good mix with a spoon At last, Garnish your blackberry mojito mocktail with fresh mint leaves or a slice of lime. I think this delicious drink adds so much to any get-together or even a cozy and romantic night at home. Tips Can I make blackberry mojito in advance? Yes. It’s actually a great idea to prep it, before any party or gathering. Muddle blackberry and min leaves and store it in airtight container. And whenever in use, just pour it into a glass and mix it with other ingredients. You May Also Like !!! How To Sterilise Jars For Preserving October 16, 2024 Read More 9 best dip recipes October 4, 2024 Read More Homemade berry jam (Without pectin) October 2, 2024 Read More 5-minute salsa dip recipe | With October 2, 2024 Read More Creamy Cashew Dip (vegan) October 2, 2024 Read More Muhammara dip recipe (red pepper and October 2, 2024 Read More Quick Garlic Butter Spread October 1, 2024 Read More Easy Benedictine Spread Recipe September 30, 2024 Read More Roast Beetroot Hummus September 30, 2024 Read More
Easy Benedictine Spread Recipe
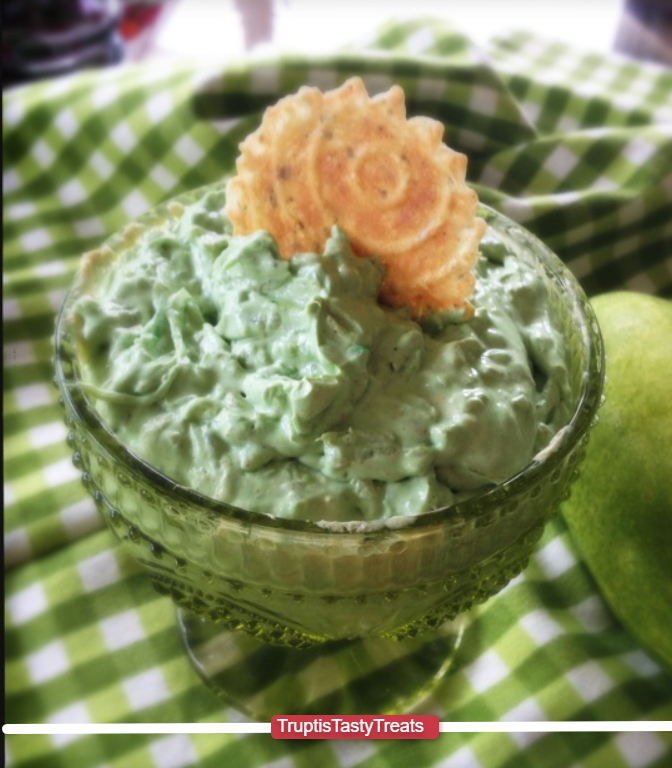
This Benedictine Spread is super easy to make at home. Also known as Kentucky’s Cucumber spread. Benedictine Spread I think everyone knows why Kentucky Benedictine Spread is so popular. But do you know the history? The most delicious and flavourful Kentucky benedictine spread originated in the 20th century by Jennie Carter Benedict, from Louisville, Kentucky. Initially, it was made from the juice of cucumber and onion. But as the generations evolve, these days it is made using cucumber and onion instead of juice. Ingredients for Benedictine Spread English Cucumber Using 2 fresh cucumbers makes it more creamy and spreadable. It gives a cooling flavour and helps the mix a little softer. Squeezing excess liquid from the cucumber makes the dip more creamy. Sour Cream It makes this dip more spreadable and a little tangy. Cream cheese To give the rich taste to your dip. Red Onion This is optional. I like the crunch of red onion in my dip. Black Pepper Fine crushed black pepper for some heat. Kosher Salt Add a little to make the dip enjoyable. Prep Time: 10 minutes Cook Time: 10 minutes Yield: 10 muffins Stpes Peel and grate your cucumber, after that using a paper towel squeeze out the excess liquid. (You should not throw that liquid – it a full of nutritional cucumber juice). Grate the onion the same as the cucumber and squeeze out the excess liquid. Mix grated cucumber with grated onion, cream cheese, sour cream, salt and pepper. Blend everything until you reach a smooth-silky consistency that can easily be transferred to a serving bowl and can be applied to a bread slice. Reasons to love cucumber sandwiches Easy and quick to make – This cucumber benedictine is so easy that you can have it anytime. You just need a few minutes. Simple yet full of flavours – Why this recipe is so famous. It is commonly served at bridal showers or lady luncheons. It never fails to impress. How to serve this Benedictine Spread: What if you make a little extra? Don’t worry! Got your back. So these cucumber sandwiches are best served immediately but you can store them in an airtight container for up to three days. You should avoid freezing the spread, as it will get grainy and watery once you thaw. You can also make an avocado spread if you want to try out different bread spreads Why cucumber benedictine is so greenish? Cucumber benedictine’s greenish hue comes naturally from the cucumbers, creating a soothing visual effect. While some recipes add food coloring for a fresher appearance, letting the natural cucumber color shine through is often preferred. Tips You May Also Like !!! How To Sterilise Jars For Preserving October 16, 2024 Read More 9 best spread and dips recipe October 4, 2024 Read More Homemade Berry Jam October 2, 2024 Read More Homemade Salsa Dip October 2, 2024 Read More Creamy Cashew Dip October 2, 2024 Read More Muhammara Dip October 2, 2024 Read More Garlic Butter Spread October 1, 2024 Read More Blackberry Virgin Mojito September 30, 2024 Read More Roast Beetroot Hummus September 30, 2024 Read More


